Waxing is, without a question, the simplest approach to create a smooth depilation procedure.
Hair removal waxing is the champion of everything, from its capacity to eliminate hair from the roots to leaving your skin with a hint of radiance! But, just like every coin, waxing has an opposing side. Wax burns are one of the many negative aspects of waxing. It's a problem that a lot of people who do at-home waxing have. It can even leave a scar on your skin in some cases. We've decoded the cause of wax burns at BIOSOFT since we believe in delivering optimum waxing solutions for your skin. Along with that, we've put out four simple steps to handle it like a master!
What Causes Wax Burn?
Hair removal waxing's effectiveness is determined by the technique used and the temperature used. You must keep an eye on the temperature while getting acquainted to the procedure through repetition. The most practical solution is to use a wax pot with changeable temperature settings. The quality of hair removal wax might also play a role in generating a wax burn in some circumstances. Before digging deeper, it is highly advised that you perform a patch test.
If you ever find yourself in a situation like this, there are four simple actions you may take to heal your wax burns.
Get Rid of Any Excess Wax.
The first step in treating a wax burn is to clean off the wax residue. Remove it with care; do not attempt to remove it with your naked hands. Apply petroleum jelly to help the process along. This will help to release the wax. Once the wax is loose enough, remove the residue with a clean gauze.
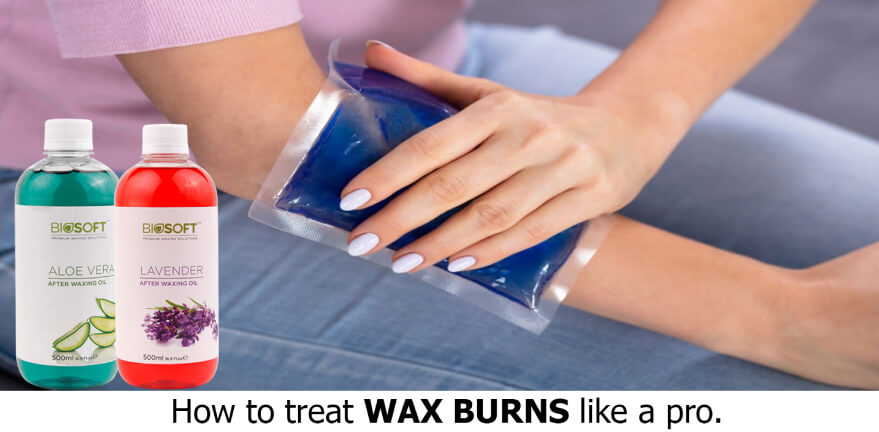
Make Use of a Cold Compress.
You must treat the damaged region as soon as possible. For 5 to 10 minutes, apply ice wrapped in a cloth or place a cold pack on the affected area. Using a moist cloth and placing it on the affected region is another technique to soothe the skin. You can also use milk, which is a powerful skin-soothing substance. Always avoid putting ice or extremely cold water on your skin.
Apply an Ointment to the Affected Area.
The next step is to apply an ointment to the affected region after it has been soothed. This is the finest way to help your skin repair even more. Apply a small layer of ointment to your skin and allow it to breathe for a few minutes. After the ointment has dried, you can cover it with a bandage if necessary.
The Dry Skin Should Not Be Peeled.
You'll notice that your skin is starting to peel away as the days pass. Underneath the dried skin, a new layer of skin will grow. This is a normal component of the healing process. The greatest thing you can do is avoid removing the skin on your own. Allow it to degrade and detach from your skin.
Apply Calming Gels.
This is the very last step in your skin care regimen. Apply a water-based soothing gel or
after wax oils to your skin after 10 or 15 days. It will also aid in the speedier healing of your skin. It becomes supple and returns to its natural state.
Wax burns are unquestionably unpleasant. To avoid this hair removal waxing nightmare, use BIOSOFT warmers, which melt wax at a low temperature. As a result, you'll have a relaxing hair removal waxing experience at home.